


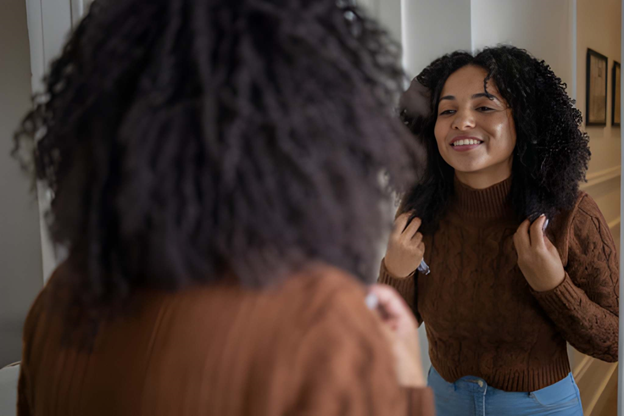
Natural curls have a personality all their own—springy in the morning, slightly rebellious by lunchtime, and somehow even cuter when they’re not trying too hard. So when you decide to add clip-in curls for the first time, you’re not just “adding length.” You’re blending textures, protecting your mane, and trying to keep everything looking like it naturally belongs on your head. On my first real wear-day, I learned quickly that the magic isn’t in piling on product or over-styling. It’s in placement, restraint, and a fast routine that respects your curl pattern—so your tresses look like they’re simply having a really good day.
Natural Hair Comes First: Choosing Among Curl Add-Ons That Actually Look Like You
Before you even think about adding extra curls, you want to start with the concept of natural hair—texture that behaves uniquely depending on humidity, porosity, and how you’ve been treating it. That “real” look comes from honoring what your curls already do well. When you choose extensions that mimic that movement, your style instantly reads as believable, not “installed.” That’s why the goal is never to chase perfection—it’s to match vibe, density, and curl personality so the blend looks effortless. Once you’re thinking that way, it’s easier to see why Best Natural Hair Clip-Ins stand out among similar curl-enhancing options: they’re flexible, low-commitment, and easy to customize to your day.
The biggest surprise from my first install? The clip-ins didn’t need to be dripping in mousse or constantly combed through to look good. The more I tried to “force” them, the less natural they looked. When I let the curls behave like curls—light touch, minimal product, smart placement—everything finally clicked. Here’s the mindset shift that helped the most: you’re not creating a brand-new head of hair. You’re giving your natural curl pattern a little support—like adding backup singers, not replacing the lead.
Your First Install Diary: What Surprised You and What You’ll Do Differently Next Time
On my first wear-day, I assumed I needed more pieces than I actually did. I also assumed the best result would come from making the clip-ins perfectly uniform. Nope. Real curls aren’t uniform, and your mane doesn’t grow in evenly distributed “sections” either. What surprised me most was how much shape matters. The moment I stopped trying to make every layer identical and focused on creating a natural silhouette—slightly fuller where I like volume and flatter where I don’t—the style started looking like mine.
The second surprise was the “bulk at the roots” issue. If you’ve ever wondered, “How do you stop curly clip-ins from looking bulky at the roots?” the answer is usually placement plus spacing. If you stack wefts too close together, especially near the crown, the clips can create a bump that screams “extensions.” What I do differently now is clip lower than I think I should, then build upward gradually—leaving air between rows so the curls can sit, expand, and blend without looking stuffed.
For days when you want a more protective option with less daily blending, you might also compare your clip-in routine to a Kinky Curly U Part Wig, especially if you’re trying to minimize manipulation while still keeping a natural-looking leave-out. It’s not about one being “better,” it’s about what fits your schedule and how much time you want to spend matching textures in the morning.
The 10-Minute Blend Routine: Section-Map, Clip, Fluff, Go
If you want the easiest way to blend curly clip-in extensions with natural hair, your best friend is a simple “section-map” that keeps your shape intentional. This is the routine that gets me from “barely awake” to “curly and confident” in about 10 minutes—without a mountain of products.
Step 1: The section-map method (2 minutes)
Instead of parting randomly, map your head in zones:
- Bottom zone (nape): fullness for length and coverage
- Middle zone: most of your density lives here
- Top zone (near crown): light placement only, for realism
- Leave-out zone (front/top perimeter): your natural curls do the talking
This keeps volume where you want it and prevents that top-heavy “helmet” effect.
Step 2: Clip with spacing (3 minutes)
Clip-ins look most natural when they’re not overcrowded. I clip the first row at the nape, then add another row in the middle, and only a small piece near the top if I truly need it. If you’re asking, “How many clip-in wefts do you need for curly hair?” the honest answer is: fewer than you think—especially because curly textures expand and create fullness on their own. Start light, then add one more weft only if you see gaps.
Step 3: The hands-only fluff rule (3 minutes)
This is the game-changer: avoid combing once the curls are in place. Combs can separate curl clumps and create frizz fast. Instead:
- Use your fingers to lift at the roots (not rake through ends)
- Shake curls gently from underneath to encourage bounce
- Pinch curl clumps lightly to keep definition intact
Your goal is shape and softness, not “perfect spirals.”
Step 4: Match curl pattern + length (2 minutes)
If your natural curls are tighter than the clip-ins, you’ll see a texture line. If the clip-ins are tighter than your curls, they can overpower your mane. The best blend happens when the curl pattern is close and the lengths aren’t dramatically different. I keep my leave-out similar in length to the top layer of the clip-ins, so nothing looks like two textures arguing.
Mini “what you used” checklist (simple, not product-heavy):
- Satin scrunchie (for quick section holds)
- Lightweight curl cream (pea-size, optional)
- Edge brush (only for perimeter styling)
- Water mist (for leave-out refresh)
Troubleshooting: How You Keep It Natural All Day Without Product Overload
Let’s answer the big one: “How do you make curly clip-ins look natural?” You make them look like they belong—by respecting density, curl direction, and how real curls move. If your clip-ins look too shiny or too defined, they can appear separate from your natural texture. I keep products light and focus on blending at the root area and perimeter instead of soaking the whole style.
If you notice bulk at the roots, try these quick fixes:
- Move the highest weft down one inch (instant flattening)
- Rotate clip placement so clips aren’t stacked directly above each other
- Tease very lightly at the base of your natural roots (only if needed)
- Avoid heavy butters near the scalp—weight creates separation
If the curls start frizzing midday, don’t panic-rake. Instead, lightly mist your hands, pat the frizzy spots, and scrunch gently. Less touching is usually more. And when you’re shopping for clip-ins that blend beautifully, revisit the best natural hair clip-ins as a reference point for textures that are made to look realistic—because the right curl pattern reduces the amount of “fixing” you need to do.
FAQs
How do you make curly clip-ins look natural?
Focus on matching curl pattern and density first, then use intentional placement. Keep wefts spaced out, blend with hands (not combing), and let your natural perimeter curls lead the look.
What’s the easiest way to blend curly clip-in extensions with natural hair?
Use a simple section-map, keep the top placement light, and refresh your leave-out with a mist-and-scrunch method. Blending is less about product and more about curl compatibility.
How many clip-in wefts do you need for curly hair?
Usually fewer than straight textures because curls expand. Start with 2–4 wefts for a natural daytime look, then add one more only if you need extra fullness in the middle zone.
How do you stop curly clip-ins from looking bulky at the roots?
Don’t stack wefts too close together, especially near the crown. Clip slightly lower, space rows out, and avoid heavy products at the base so the style lies flatter and moves naturally.